General description, reasons for the creation and application cases of TR-069
SNR routers have many remote control and diagnostic mechanisms, one of which is the TR-069
The TR-069 protocol, known as the "CWMP" (CPE WAN Management Protocol), was created in 2004 by the non-profit organization Broadband forum (BBF) due to the growing number of CPEs that required unification, standardization of service, configuration and monitoring on the network from telecom operators. The protocol defines the principles of interaction between client devices and the autoconfiguration server (ACS).
- Initial installation and configuration of equipment;
- Monitoring of devices for problems;
- Configuring Wi-Fi CPE;
- Installing and updating software on CPE;
- etc..
One of our recommended remote management solutions is GenieACS, which is released under an open source license and is not proprietary.
When writing this documentation, we used it. You can find out more about GenieACS at the link: https://genieacs.com
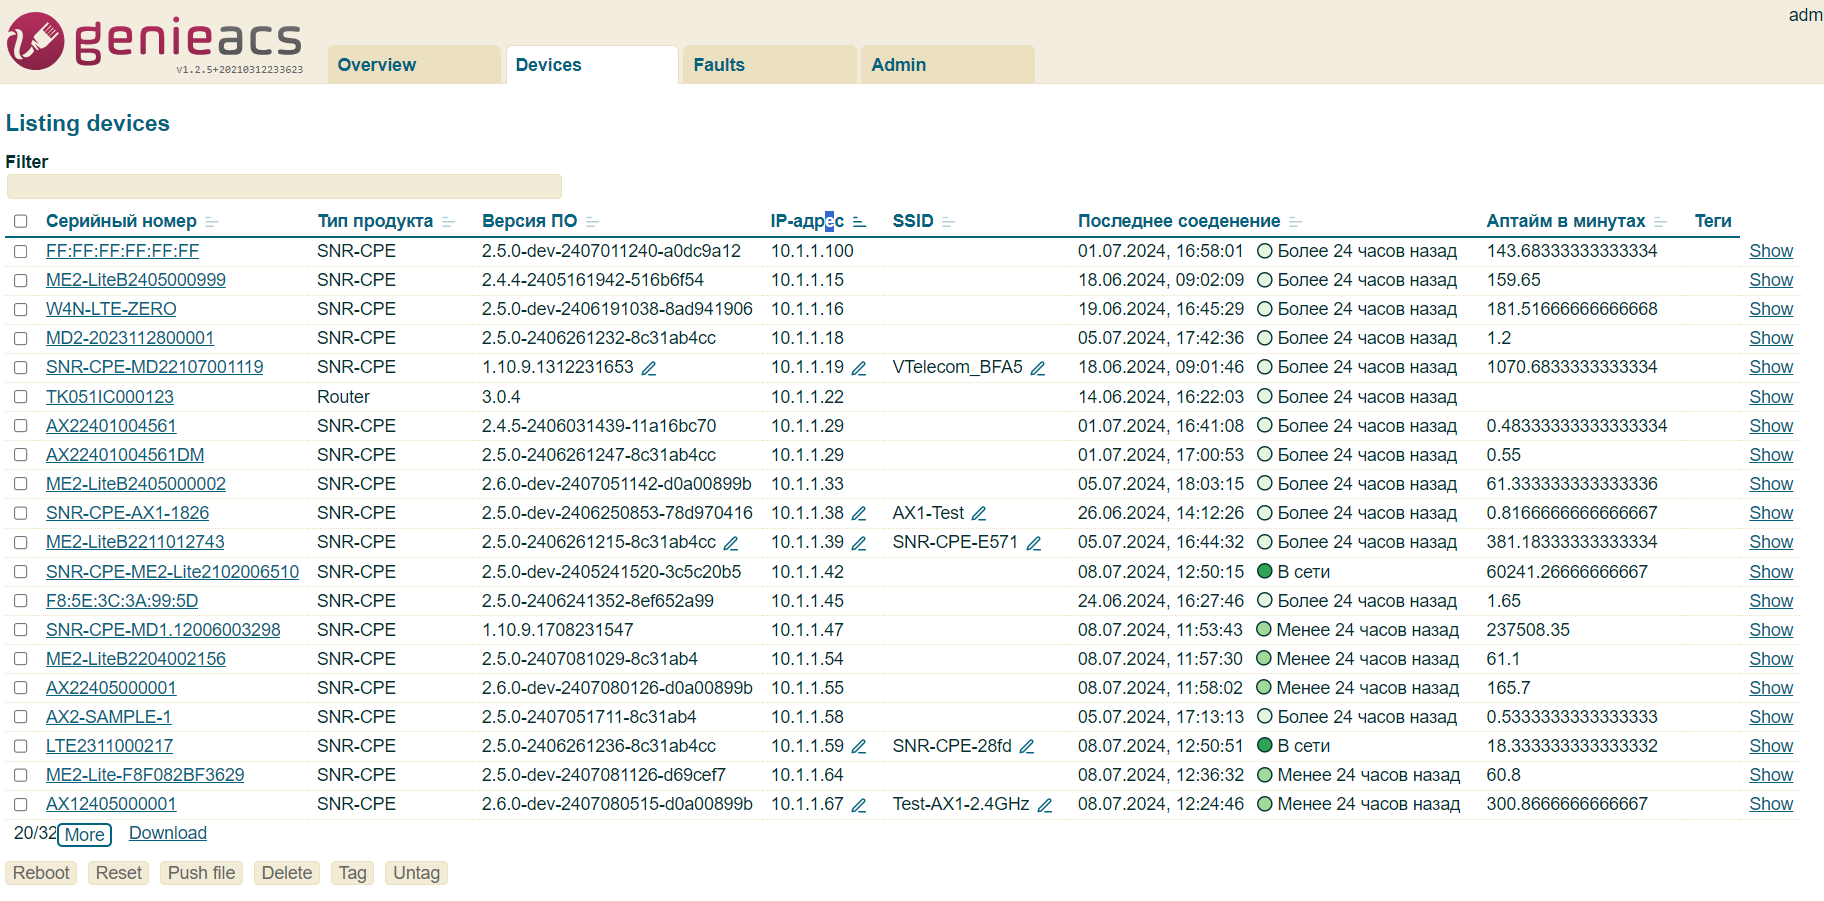
When using GenieACS, the Devices section displays CPUs that have been authorized to ACS.
Clicking on the CPU from the list will give access to detailed information about the CPE itself and its parameters.
Next, using the example of GenieACS, let's look at the frequently used CWMP functionality.

Automatic CPE setup
If it is necessary to implement equipment to the client, autoconfiguration scripts will help to change the necessary parameters and speed up this process.
By adding a script in the Admin → Provisions → New section in GenieACS, you can set the necessary default settings.

For example, the factory configuration of the SNR-CPE specifies 44 channels in 5 GHz Wi-Fi. The example shows a condition for the script that will change the parameter to "Auto-select":
Add the Admin → Provision condition by clicking the New button.
|

Then add the Admin → Presets preset by clicking the New button.
|

When the event 0 BOOTSTRAP is specified, the "Auto-select" parameter for the 5 GHz Wi-Fi channel will be applied during the first installation of the router at the user.

Manual CPE setup
Similar to the settings in the WEB UI, parameter changes are available in ACS via CWMP.
As an example, through ACS, you can change all Wi-Fi options on CPE using the node:
InternetGatewayDevice.LANDevice.{i}.WLANConfiguration.{i}
| |
| WEB UI | CWMP |
| .RadioEnabled |
| .Name |
| .Standart |
| .AutoChannelEnable |
| .AutoChannelEnableBased |
| .AutoChannelEnableInterval |
| .OperatingChannelBandwidth |
| .TransmitPower |
| .WPAAuthenticationMode |
| .KeyPassphrase |


Diagnostics of connected Wi-Fi devices
Using CWMP, you can perform diagnostics, monitor the radio broadcast and the status of the parameters of connected clients.
Let's take a look at the Wi-Fi parameters nodes of the connected WLAN client:
InternetGatewayDevice.LANDevice.{i}.WLANConfiguration.{i}.AssociatedDevice.{i}
| |
| WEB UI | СWMP |
| .X.SSID.X_SNR_WLAN_BAND |
| .AssociatedDeviceMACAddress |
| .X_SNR_RSSI |
| .X_SNR_Uptime |
| .X_SNR_LastDataReceiveRate .X_SNR_LastDataTransmitMode .X_SNR_LastDataReceiveMode |


Connection monitoring and diagnostics
When a customer contacts technical support, the telecom operator can diagnose LAN and WAN connections using the ping and traceroute utilities in the WEB UI.

The same actions can be performed centrally via CWMP parameters:
To run diagnostics, you need to specify the values in the parameters:InternetGatewayDevice.IPPingDiagnostics
InternetGatewayDevice.TraceRouteDiagnostics
- .Host - URL or IP-address
- .DiagnosticState - status "Requested"
- .Interface - interface (for example "ra0")
After applying these values, update the entire node again. Status of .Diagnosticate will change to "Complete".
For use ping и traceroute identical actions are performed, but it will take more time to display the results of the latter.
| Ping | Traceroute |
|---|---|
|
|


Installing and updating the software configuration
To update a group of devices not individually, but massively and centrally, you can install the firmware image on ACS, then update manually, or through a provision script.
To download the software to the server:
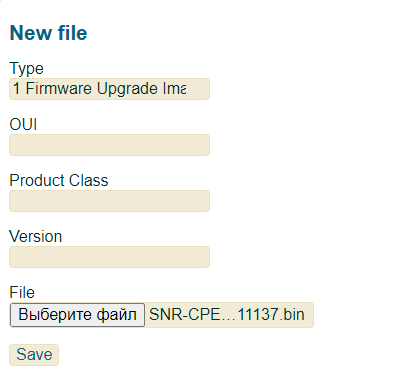
- In the Admin → Files section, click New to download the image from the local device.
- In the Type item, select 1 Firmware Upgrade Image, the items OUI, Product Class, Version can be left empty.
- In the File item, select the binary firmware image that you want to upload to the ACS server.
- Click Save.
There are 2 ways to install the software image on ACS-connected routers:
The Devices section displays CPE's that have successfully logged in to ACS.
Using Filter, we select the CPE we need, in the example this is SNR-CPE-ME2-Lite.
Use the Push File button to select the firmware downloaded to ACS, click Queue and Commit, after which the firmware will be updated on CPE. |


Create a script in Admin→ Provisions → New, specify the previously added firmware file in it.
Create a preset in Admin → Presets → New, specifying a previously created script, a condition for accounting for the model name, 1 BOOT event, a condition for accounting for the current version on the router and a parameter for accounting for the response time once a day from 4:00 to 4:59 in cron format. |

